I love trivia. One of the things I picked up somewhere along they way is about almonds. There is a big debate in California about how much water is being used in industrial agriculture. I heard a statistic that it takes one gallon of water to produce one almond. This seemed like a lot so I looked it up. Turns out it takes 1.1 gallon for that single almond! Although that doesn't make for a good line - "one gallon of water" just sounds better.
If you don't believe me you can look it up - here is just one source. There are some sources from the USDA but they are a lot harder to read.
I was making a glass sculpture last year, not thinking too much about what I was going to make. I glued up some optical glass blanks and used colored HXTAL (an epoxy glue) that was brownish orange in color. As I ground the blank I noticed that it looked suspiciously like an almond cut in half lengthwise. So if it takes a gallon of water for a full almond then it stands to reason half an almond takes half a gallon.
Here is a picture:
And another view:
Not sure which display position I like best.
I ate about 15 almonds in making this post, so I used my share of H2O for the day!
I'm fortunate to belong to a small group of about a dozen artists. We have a fine arts sale every year in late November or early December. This year our sale is Friday and Saturday December 11th and 12th. I'm lucky to be the only glass artist.
I'll be showing my latest foray in glass - dyed glue optical glass sculptures.
Stop by if you are in the area
Last summer I attended a workshop at The Studio at the Corning Museum of Glass. The workshop was all about cold construction of glass. This includes gluing optical glass blanks with colored glue. The instructor was Vladimir Klein. Check out his website here. Vladimir is very well known in Europe but not so much in the U.S.
 |
| A typical "Klein boat" |
 |
| Vladimir at work |
The workshop "Teaching Assistant" was Martin Rosol, a well known glass artist in his own right. Martin doesn't have a website but here is one good example of his work.
Vladimir has a very interesting technique - and one I was probably most worried about. The technique is "chipping" the glass with a hammer and chisel. Now my thoughts are glass and hammers don't even belong in the same room together, much less as a way to make beautiful art glass.
I haven't done too much chipping yet, as it makes a mess and glass chips fly everywhere. However I did think a homage to Vladimir was in order. If he can use a metal hammer on glass, why not make a glass hammer on steel. Here is the resultant piece.
This is an old post that I found in a Draft mode from a couple of years ago, but it is still relevant, so here it is!
A few years ago I was out mowing the lawn one nice summer day. Things are going along fine when all of a sudden there is a loud grinding noise coming from the blades. I know and hate that sound. It means I've hit a rock. That usually means beat up blades, a lot of work to repair/replace, and the lawn is only half-mowed. I stopped, got off the tractor, and found the source of the noise. I dug up the offender. Rather than tossing it into the woods or putting somewhere out of the way, I took a deeper look at the rock. It seemed to have a very interesting shape. I set it aside for later.
A closer look at the blades indicated it must have been a glancing blow as there wasn't any damage - or at least any new damage - to the blades. I finished mowing the lawn.
Several days later I looked at the rock again with a different point of view. I liked the shape, the size, and form. There is a Japanese art form called Suiseki. From Wikipedia - "These stones are not just any stones which can be found in nature; they must be expressive stones and have a special shape, color and texture to be categorized as suiseki. There is a distinction between landscape and object stones. The former reflect landscapes such as mountains, lakes or rivers, while other stones have object shapes that resemble animals or sculptures."
I had been looking for a good suiseki for some time. I hadn't spent a lot of energy but always felt like I'd know it if I saw it. This was the one. I set about designing a glass stand for the rock, in the true nature of Suiseki. However, one thing was still bothering me.
Then the thought occurred - why not make the rock in glass as well.
The story of making the rock is quite a bit of work - rubber molds, mother molds, two part molds, casting, etc. I'll document that at some other point. In the meantime, here is "The Rock".
Would you pay $50 for a shop apron? I thought the idea was crazy until I saw one in action during my recent workshop at Corning. Ethan Stern was teaching in the hot glass shop and doing a lot of cold working as well. He had a great looking apron and everyone was inquiring where he obtained it. Come to find out he was selling them as well.
So why buy one? Three things come to mind. First, the wonderful idea of turning up the corners to create a funnel for the water to drip down between your feet instead of directly on your shoes. The second is the straps. I've been using a decent $10 restaurant supply house apron. It has a string that goes around your neck and ties behind your back. I'm not good enough to tie it, and it digs into my neck after a while. It constantly needs adjusting. Ethan's have wide straps - about the size of seat belts that don't require tying. Finally, the coverage, especially near the shoulders/arm pits are covered much more effectively.
Here is a picture of me modeling my cold working set up. Note that the face mask is more for the total effect. I usually use paper masks. I find the Bose noise-cancelling headphones work amazingly well around grinding equipment. Also, a fourth cool thing about the apron - it has a phone/iPod pocket on the inside! I think it will take a little while for all the wrinkles to settle out.
And here is me working away.
If you want one of these, contact Ethan via his email. His website is here.
I've been interested in making food items in glass for quite some time. My goal is to ultimately make sushi and sushi accessories such as plates, soy sauce bowls, and chopsticks in a fairly large scale. One of the people I respect in glass, and certainly has a bunch fun making his large scale food, is John Miller. John makes large scale works of things like hamburgers, french fries, beer bottles and other great items. The hamburger alone is probably 20" across and must weigh 50 pounds.
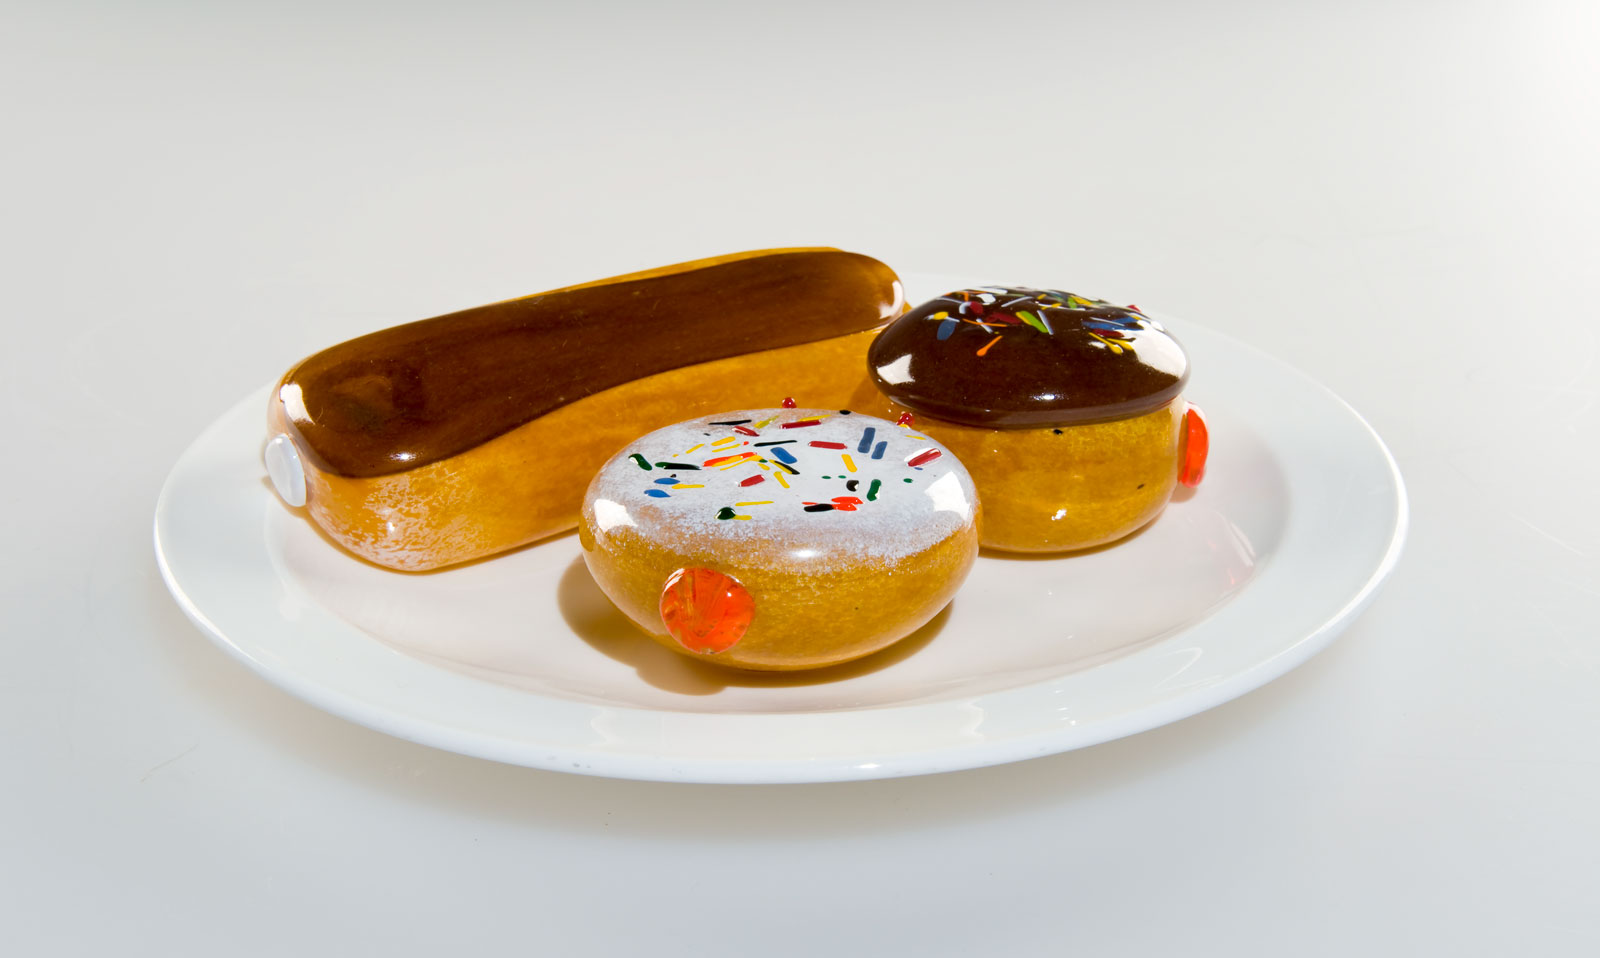
I made some small sliders - more on that in a future post, but John is the king of diner food and I wanted to create something of my own. I settled on donuts. Over the past few months I've been making various jelly donuts. These include chocolate glazed and powdered strawberry stuffed, as well as chocolate covered cream stuffed eclairs (we call them long johns in the midwest).
While I was at Corning recently, I took advantage of the great photography skills of the resident photographer, Ann Cady, to get these great photos which show off the idea. Ann's business is called ARC Photographic Images and her website/contact info is here.
Now all I need is a nice cup of coffee...
I just returned from The Studio at the Corning Museum of Glass where I participated in the workshop on glass casting led by Richard Whiteley. What a great experience!!!! I've now been privileged to attend 10 workshops at The Studio and I think this one ranks up there as #1. There are too many things to go into - suffice it to say that if you ever get a chance to work with Richard - take the plunge. It will be rewarding.
First off, workshops at Corning have a "teaching assistant" whose main job is to herd the cats (workshop participants), fire the kilns, and generally keep people from doing silly stupid things. We had much more than a TA though. Heike Brachlow was our TA for the session. She should have been considered as co-instructor. She did so much more than the typical BA. She is a world class glass caster in her own right. Check out her work here. One of her movement pieces was featured on the cover of the Bullseye catalog #7.
Check out Richard's work here. Richard treated the workshop more as a very abbreviated class he would teach at the Australian National University. This is very different from what I've experienced in past workshops. There was an equal amount of thinking/planning as there was actual hands-on work. At first, I questioned this approach but I think it was much more effective.
Richard and Heike were sticklers for safety and health practices - requiring dust masks, eye and hearing protection. Here is a picture showing how we usually saw him during the day.
And here is a picture of me working on a mold.
I'll post some additional topics about the actual pieces I made during the workshop in the near future, along with photos.